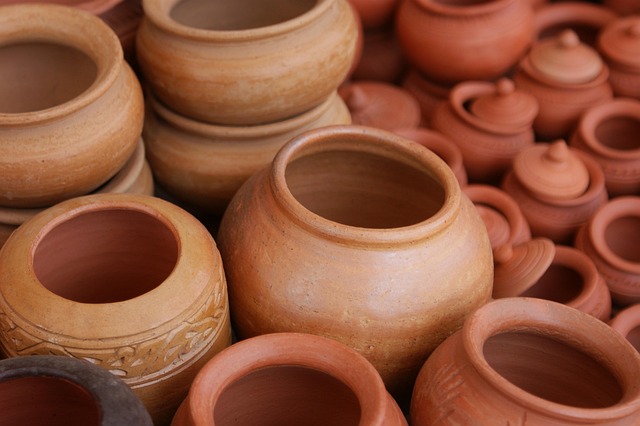
Shaping techniques for vases: control the cylinder, design the profile, and finish with clean trimming lines
This module teaches the unglamorous mechanics that make decorative pieces feel calm and intentional: even wall pulls, compression passes, leather-hard timing, and a foot ring that reads clean on a shelf.
Technique cue
Pull with fewer passes and clearer intent. Evenness comes from consistent pressure, not from chasing thin spots with extra pulls.
What this module covers
Shaping is where material control becomes design control. The goal is not dramatic movement on the wheel; the goal is repeatability. You will learn to build a stable cylinder, then move toward vase profiles with measured changes: narrowing a neck without choking the wall, lifting a shoulder without thinning it into a weak point, and compressing the base so it survives drying without S-cracks. We treat the pot as a set of decisions you can diagnose: rim thickness, belly volume, and the relationship between foot diameter and overall height.
You will also learn timing. Many “mystery” failures happen because trimming started too wet, or because a tall form dried faster at the rim than the base. The lessons include leather-hard cues, how to support a piece for trimming, and how to adjust the next attempt instead of repeating the same mistake. By the end, you should be able to plan a practice set, throw a series, and evaluate outcomes with calm, methodical notes.
Even walls, clean lift, stable base
We practice centered cylinders until the thickness is consistent. From there, shaping becomes a controlled edit. You will use compression, support hands, and rib passes to refine the surface and strengthen the form.
- Base compression passes to reduce stress cracks
- Fewer pulls with steadier pressure for evenness
- Profile checks: rim, shoulder, and foot relation
Neck control without collapse
Learn when to pause, when to support, and how to tighten a neck while keeping enough structure beneath it.
Proportion for home décor
Simple ratios and silhouette cues so your vase reads balanced on a shelf, console, or table.
Trimming that looks deliberate
Foot rings, crisp transitions, and stable trimming support. We show how to avoid chatter and how to stop before you thin the base too far.
A repeatable critique loop
A short notes format to track: wall thickness, drying time, trimming stage, and what you will change next.
A shaping timeline you can follow
The lessons are taught as a sequence because each step protects the next. Skipping ahead usually shows up later as a weakness: a thin base, a distorted shoulder, or a rim that dries too fast. The timeline below is the backbone. You can apply it to wheel-thrown vases and to hand-built vessels that still need the same stability checks.
Each step includes a “technique note” and a quick self-check. That makes practice more honest. Instead of guessing why something failed, you can trace it back: centering pressure, opening depth, thickness at the neck, or the trimming stage. Over a few cycles, the improvements become visible and repeatable.
Studio term you will hear a lot: compression
Compression is deliberate pressure that tightens clay at the base or along the wall. It reduces micro-cracks that later become failures during drying or firing.
-
01
Centering and opening
Establish a calm, centered mound and open to a depth that preserves the base. Technique note: add compression passes on the floor of the pot before you start pulling.
-
02
Pull walls with intention
Fewer pulls, steadier pressure. Technique note: check thickness just above the base and at the neck area, where stress often concentrates.
-
03
Shape the profile
Move from cylinder to vase profile using ribs and support. Technique note: avoid a sharp pinch point at the shoulder; it often turns into a crack line during drying.
-
04
Trim and finish
Trim at the right leather-hard stage for crisp lines. Technique note: stabilize the piece well and stop early if chatter starts; re-check moisture before continuing.
Design note for interior pieces
A calm silhouette often reads more “designed” than an extreme curve. If you want drama, put it in one place (rim detail, shoulder, or glaze break), not everywhere at once.
Common shaping issues and what to adjust
Most shaping problems are specific, not mysterious. A leaning form usually comes from uneven thickness or late-stage shaping on clay that is too soft. A crack at the base often points to weak compression during opening, or a base that dried faster than the wall. Chatter in trimming is often about support and moisture timing rather than tool sharpness alone.
We teach a quick diagnostic routine: look at the profile line, then check three zones—rim, shoulder, and just above the base. If one zone is noticeably thinner, you adjust the next practice set by changing where your pull pressure starts and ends. You will also learn how to keep consistent wall thickness without over-working the clay, which can introduce fatigue and collapse at the last minute.
Wobble and lean
Adjust: stop shaping earlier, refine with a rib, and check that your cylinder is even before you move into a neck.
Cracks in drying
Adjust: compress the base more, slow rim drying, and use a cover schedule so wall and base move together.
Quick self-check after throwing
- Is the base thick enough to trim without fear?
- Does the rim feel supported, not floppy?
- Is the shoulder transition smooth rather than pinched?
Register and start building repeatable shaping skills
Send your name and email. We will reply with the next start date, the learning format, and a short setup checklist for your first shaping drills. We do not sell your data, and you can request deletion at any time.
Educational training only. Creative results vary according to individual learning progress and artistic practice.