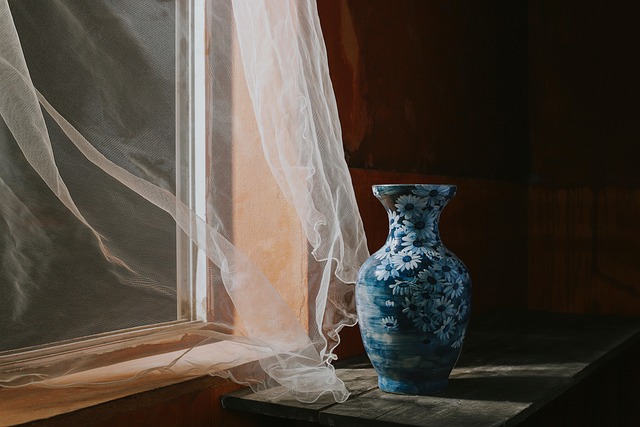
Learn to make decorative ceramic vases with confident shaping and refined glaze choices
gelakeatm is an educational course focused on the practical studio workflow behind handmade home décor pieces. You will practice clay preparation, develop clean silhouettes, and learn glazing methods that suit interior styling—one deliberate step at a time.
A course built around studio decisions
Learn how to choose clay bodies, control wall thickness, and plan glaze tests so your pieces feel intentional in real interiors.
Course Benefits
Decorative ceramics live at the intersection of material and proportion. A vase can be perfectly thrown and still look awkward on a shelf if the shoulder is too abrupt, the foot is too light, or the glaze doesn’t suit the room’s palette. This course teaches the studio fundamentals while keeping a designer’s eye on silhouette, balance, and surface. You will work through a repeatable process: choosing a clay body, preparing it to reduce lamination, building stable forms, trimming clean lines, and finishing with glaze tests that behave predictably in firing.
The emphasis is unglamorous but essential: compression, wall thickness, drying control, and the small habits that prevent cracking and warping. Alongside technique, you will learn how to evaluate work like a maker—reading a profile, spotting tension points, and adjusting the next piece instead of guessing. The goal is not a single “perfect” vase; it is a dependable workflow you can use again and again for handmade interior pieces.
A studio workflow you can repeat
Build habits that hold up: wedging and moisture control, rib compression, trimming to a clean foot ring, and surface planning with test tiles. You learn why each step matters, not just what to do.
- Clear checkpoints: plastic stage, leather-hard, bone-dry
- Form analysis: profile lines, shoulder tension, stability
- Glaze planning: viscosity, layering, and safe margins
Proportion that reads well in a room
Learn to design with the shelf in mind: height-to-width ratios, negative space, and how a rim changes the silhouette.
Hands learn through repetition
Short practice sets keep you moving: cylinders, neck pulls, and controlled curves—each designed to train specific muscle memory.
Glaze choices that behave in firing
Understand what you are seeing: pinholing, crawling, and thickness issues. You will learn to record tests, adjust application, and select finishes that complement interior materials.
Notes you will actually reuse
A simple log format for clay body, shrinkage, glaze recipes, and firing notes—so your progress stays traceable.
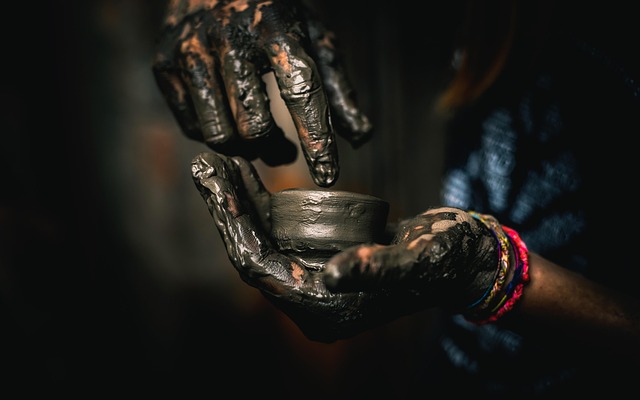
Clay Preparation
Good work starts before the wheel or the slab table. You will learn practical preparation for consistent results: wedging to align platelets, checking moisture so the clay responds evenly, and spotting lamination before it becomes a crack line. The module covers clay bodies used for décor objects, including how grog changes tooth and drying behavior, and why shrinkage matters when you plan lids, collars, or narrow necks.
We also cover timing—plastic stage versus leather-hard—and how to set up a drying routine that keeps rims and bases in sync. These are small studio habits: wrapping strategies, flipping, and using a damp box when needed. The goal is stability. When the clay is prepared well, your hands can focus on form rather than fighting the material.
Moisture check
Simple squeeze and coil tests to avoid over-soft clay that collapses during pulls.
Wedging rhythm
Consistent spirals to reduce air pockets and align the clay for cleaner throwing.
Drying plan
How to cover, flip, and slow down drying so rims and bases move together—especially important for tall vases and narrow necks.
Technique note
If you see a faint “book page” line in a cut section of clay, treat it as a warning sign of lamination. Re-wedge before you commit to a tall form.
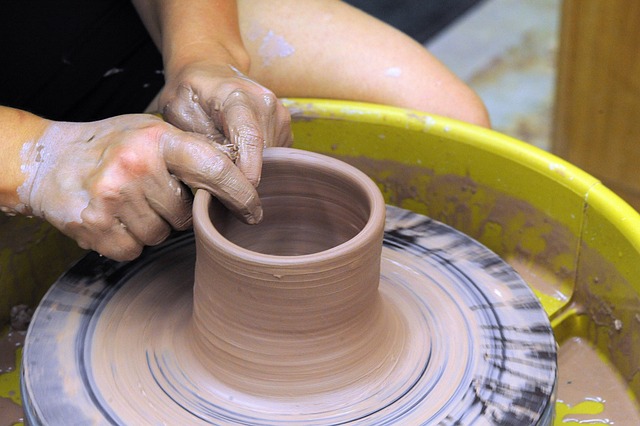
Shaping Techniques
This module is where most learning happens: forming cylinders, opening the base without thinning the center, pulling walls evenly, and refining curves. You will practice controlled lift and compression so the form stays stable as it grows. We cover common vase profiles—straight, shouldered, bulb, and narrow-neck—then discuss how each profile affects use and display in a home setting.
Trimming gets equal attention. A clean foot ring and a crisp transition from belly to base make a piece feel finished. You will learn how to read the leather-hard stage, choose trimming tools, and avoid chatter by stabilizing the piece. Throughout, we use small, concrete cues—rim thickness, sound, and tool marks—to diagnose what to adjust next.
-
01
Centering and opening
Learn consistent centering pressure and an opening depth that preserves base thickness. Technique note: use compression passes to reduce S-cracks later.
-
02
Wall pulls and control
Build even walls with fewer, more deliberate pulls. Technique note: check thickness at the neck and just above the base where stress concentrates.
-
03
Profile shaping
Use ribs and steady support to create clean curves. Technique note: avoid “pinch points” that look dramatic but invite cracking in drying.
-
04
Trimming and finishing
Define a foot ring, refine the lower curve, and finish edges. Technique note: trim in stages if the piece is large to avoid tool chatter and distortion.
Design cue for décor pieces
A slightly heavier base and a calmer shoulder often read better on shelves. Dramatic necks can work, but they need enough wall support to survive drying and firing.
Glazing Methods
Glaze is chemistry, but it’s also restraint. This module focuses on practical application: mixing to a consistent viscosity, sieving, and applying with an eye for thickness and edges. You will learn dipping, pouring, and brushing strategies, plus how to build a small test library that makes future choices easier. We discuss surface outcomes relevant to interiors—matte, satin, glossy—and how lighting changes what you see.
You will also learn how to troubleshoot typical kiln results. Pinholing, crawling, and blistering are often about preparation and thickness rather than “bad glaze.” We introduce kiln basics, cone concepts, and recording firing notes so you can connect cause and effect. The goal is reliable surfaces with intentional variation, not accidental surprises.
Mixing and consistency
Learn to mix, sieve, and store glaze so it applies evenly from the first test tile to the last.
Application control
Dipping, pouring, and brushing methods with crisp edges and clean glaze breaks.
A simple test-tile system
Build a small library: labeled tiles, thickness notes, and firing outcomes. Over time, your “glaze choices” stop being guesswork and become a practical reference.

Student Gallery
A gallery is not about perfection; it is about progress you can see. The pieces below represent typical course outcomes: cleaner rims, more confident curves, and glazes that look intentional. Some students lean toward quiet satin neutrals; others experiment with layered color breaks. That variety is expected—ceramics is a material practice, and each maker’s decisions show up in the final surface.
A set of tall forms where neck control and base stability improved through repeated pull drills.

Kiln day results: consistent glaze thickness and cleaner bottoms through careful waxing and wiping.
Hand-building practice: slabs, joins, and compression marks that were later refined into clean surfaces.
Mini case study: Vase set for a concept apartment
Problem: A student wanted three vases that felt cohesive on a shelf but didn’t look identical. Approach: we defined a shared rim detail and foot ring, then varied shoulder height and belly volume while holding wall thickness steady. Outcome: the set fired without warping, and the glaze tests produced one matte base finish plus a single accent dip for contrast. — Lenka P., Interior stylist, Brno
Mini case study: From collapsing cylinders to stable tall forms
Problem: Tall pieces kept collapsing at the final pull. Approach: we simplified the number of pulls, used a rib for compression, and introduced a timed rest so the wall could stiffen slightly before shaping the neck. Outcome: the next firing produced two tall vases with even walls and a clean shoulder curve, ready for controlled glazing. — Marek S., hobby ceramicist, Brno
“The glaze section finally made sense when we started logging thickness and firing notes. I stopped chasing random results and began building a surface library I can trust for future décor pieces.” — Jana K., design student, Brno
“The trimming checkpoints were a turning point. The pieces look calmer and more deliberate, and the foot rings are actually clean now. It’s methodical work, but the results show.” — Petra L., home décor maker, Brno
About Us
gelakeatm was founded in 2021 after we saw the same pattern in studio classes: students could copy a form once, but struggled to repeat it with control. The missing piece was a clear, teachable workflow—how to prepare clay, how to diagnose thickness, and how to plan glaze tests so the kiln result is not a surprise.
Our mission is straightforward: teach handmade ceramic vases and décor pieces with studio-grade technique and design thinking. That means focusing on the craft details that matter—compression, drying discipline, trimming lines—while also teaching how a piece reads in an interior. The course is educational training only, and it respects the fact that creative work takes time.
Contact details
What we teach, in plain terms
Ceramics has a “quiet” skill stack. A stable vase is usually the result of many small decisions: how the base was compressed, when the piece was covered, how the rim was refined, and how the glaze was applied at the right thickness.
We teach those decisions as a sequence you can follow. You will learn to evaluate forms with a critical eye, keep a short studio log, and make incremental improvements with each cycle of forming, drying, bisque, and glaze firing.
Course highlights
- Clay body selection, wedging, and moisture control for repeatable forming.
- Shaping drills for cylinders, shoulders, and narrow necks with stable profiles.
- Glaze testing and application methods suited to interior décor finishes.
- A simple documentation habit that keeps results traceable across firings.
FAQ
These answers reflect how the course is taught and what you can realistically expect from a practice-based craft curriculum.
Ready to learn studio-grade ceramic technique?
Register with your name and email. We will reply with the next start date, format details, and a short checklist for your first sessions. We do not sell your data, and you can request deletion at any time.
Educational training only. Creative results vary according to individual learning progress and artistic practice.
Disclaimer
Educational training only. The course provides instruction in ceramic techniques and design approaches for handmade decorative objects. Creative results vary according to individual learning progress and artistic practice. Any examples or outcomes shown are illustrative and depend on factors such as materials, drying conditions, firing schedules, and individual skill development.